One of the more challenging aspects of digital recording is controlling your levels. You want a strong level, to maximize signal to noise ratio, but too strong, and you get clipping, which introduces nasty pops, rather than the saturation that analog recording used to provide.
During the recording and mixing process, there are several places where clipping can occur, or your level may be too low.
In the following examples, I am going to attempt to outline how the signal travels through your DAW, and how best to manage that signal.
Because we have many different hardware configurations, there may be things here that do not apply to your particular set-up.
This is intended as a general guide, and is not a hard and fast set of rules.
First, we are going to look at recording audio.
1.A basic view of signal flow, end to end.
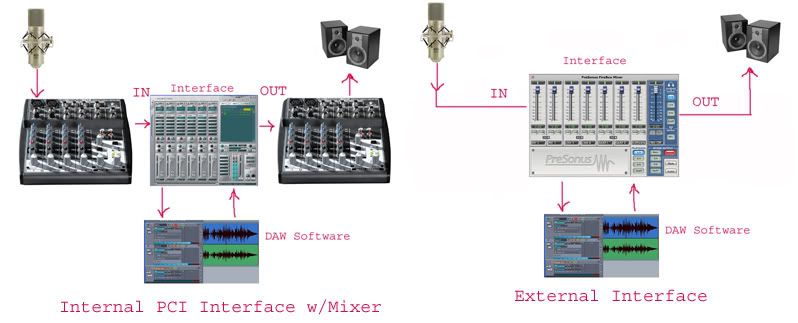
Here, we have a source, some form of pre-amp, input to the software, the software itself, an output, and finally, monitors or maybe headphones.
The Source. This is where it all starts. Any distortion introduced here will be faithfully reproduced throughout the chain.
By the same token, if this is too soft, it can be a struggle to get an acceptable level from the recorded track. Here, mic placement and technique is the key to starting with good sound.
The Pre-amp. This is your first gain stage. The pre-amp raises your signal from the very low level coming from the mic or instrument to a usable level that is well above the inherent noise in the electronic circuits. Here, you want to adjust the gain (may be labeled trim) to give a strong signal without introducing distortion.
Generally speaking, you should adjust your preamp Trim (or Gain, it could be labeled either way) to slightly below the point where the Clip (or Peak) indicator flashes.

In addition, on a mixer, adjust your strip levels and Main Out so that the meter shows peaks around 0db. The Peak (Clip) indicator here should never light up. These are also the controls you will use later when adjusting recording levels in MC.
If you are using am external mixer, adjust the level for the individual strip, and the main output, so that the level peaks around 0 on the loudest notes.
So far so good. Now we get into the part where things start to get a little hazy, the corelation between the input and recording level in your track.
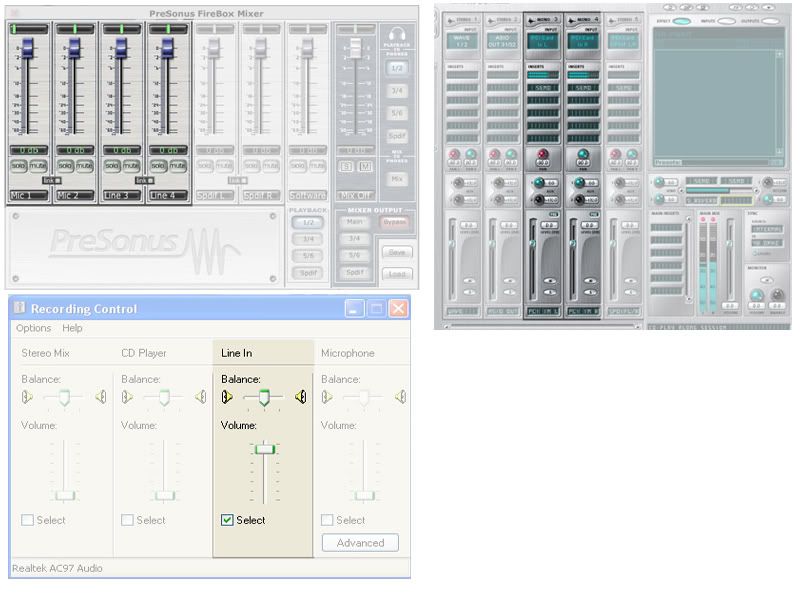
You cannot adjust the recording level within MC or SHS (or Sonar). The level must be set by the software that controls your interface (sound card).
Here, we see the Input controls for the Presonus Firebox, E-MU0404, and the standard Windows Recording Control.
OK, so let's record something.
Open MC, and insert as many audio tracks as you need. Also, open your interface control, so it is available onscreen.
For this example, I am using two mics, an MXL991 and an MXL990 to record an acoustic guitar.
I will be recording the Left input as Mono to track 4, the Right input as Mono to track 5, and both inputs as Stereo to track 6.
You may not normally want to do this, but it serves to illustrate what you would see recording stereo or mono.
Let's do a sound check.
Arm your track(s) for Record. This sets the meters to monitor the incoming signal.
Strum ( or sing) a few bars at the loudest you will be playing. Watch your meters.
Ideally, you should see something like this:
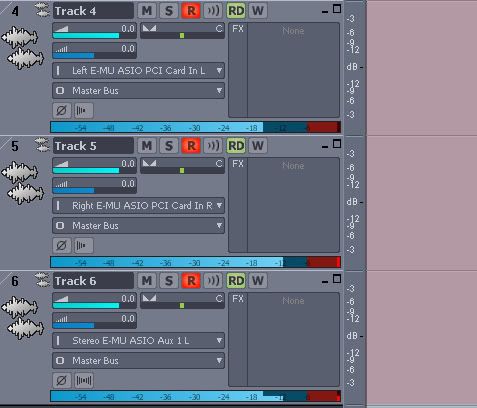
If the level is too hot( meter showing red), adjust the slider to in your interface control to lower the incoming level.
If it it too low, raise the slider.
If you are using an external mixer, it's usually best to leave the interface control set to 0, and use the mixer to adjust your levels.
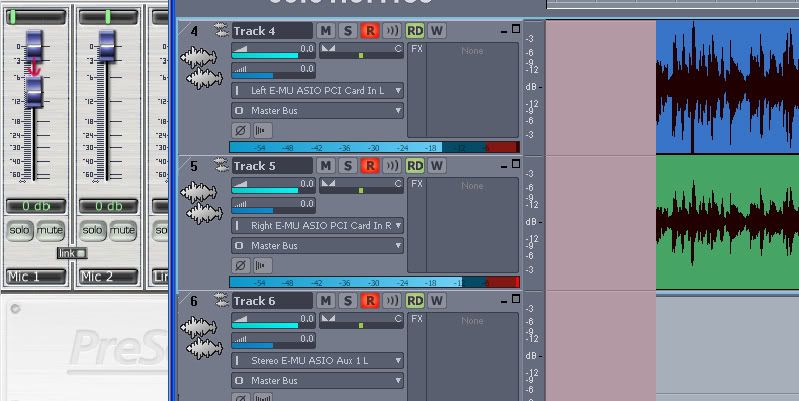
If all is good, click the record button.
As your track records, you should see strong, well defined waveforms appear on your track.
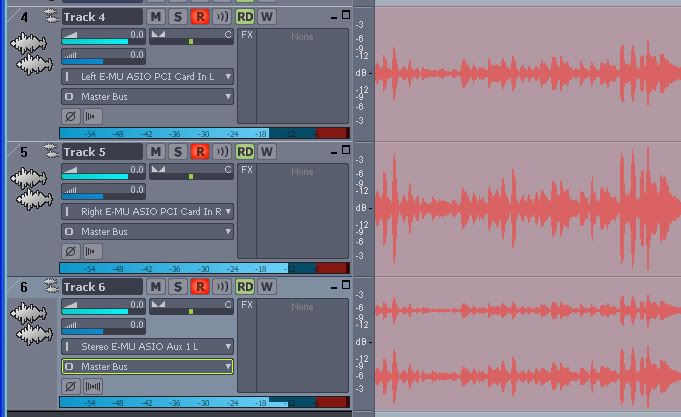
When you are done recording, turn off the Record Arm button. This will switch the meters to monitor playback.
In the following screen shot, the meters for track 4 and 5 show playback levels.
Track 6 is still monitoring the input, and even though the track is actually playing, the meter shows no activity.
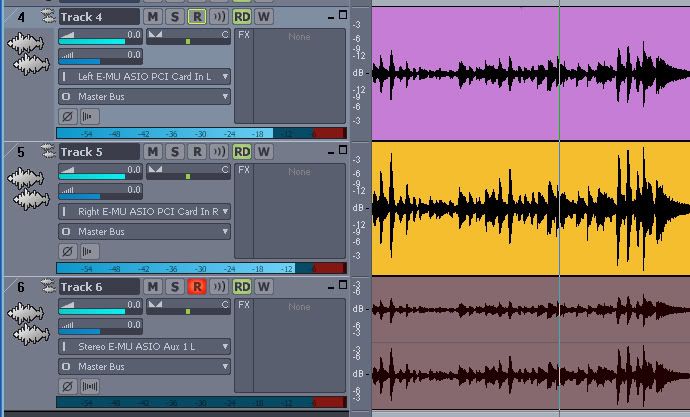
So far, we have healthy audio tracks recorded.
In part 2, we will explore controlling your levels as you work through the mixing process.
Edit:to add preamp info